All images were shot with a 40D, MPE65 1X-5X macro lens
I have two images to start with:
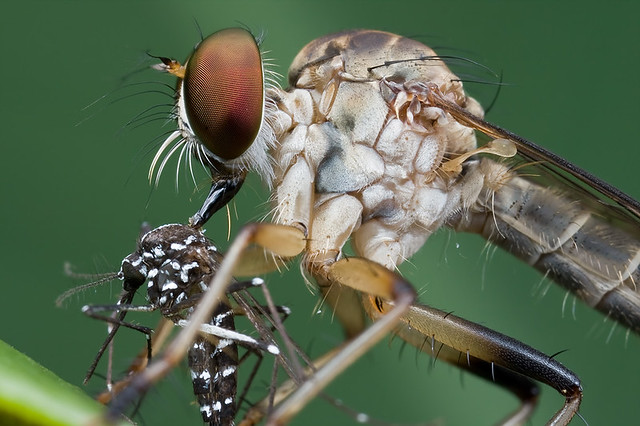
I will call this "Recipient". This is the one I like, but notice the eye is OOF (out of focus)
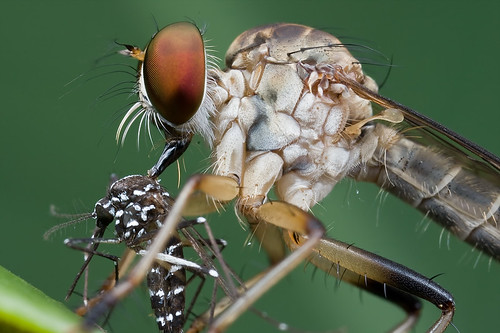
But lucky for me, i have another shot, which I will call "Donor". I prefer "Recipient" over "Donor" but "Donor" has the eye in focus.

Now the fun part.
(a) I opened both images, one after another in my Adobe CS3.
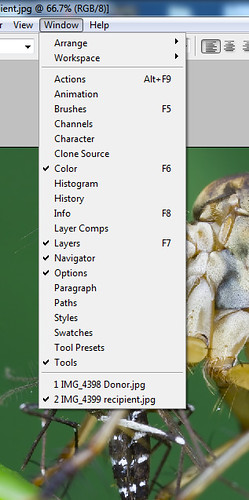
(b)
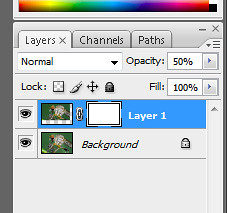
Then I go to the "Donor" image, and Select All (Ctrl+A) then Copy (Ctrl+C), then I Paste (Ctrl+V) Donor onto the Recipient image. Now you can see "Layer 1" on top of Background (Recipeint). Notice i also adjusted the Opcacity to 50%.
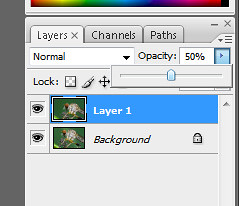
(c) your screen will something like this once you have adjusted Layer 1's opacity.

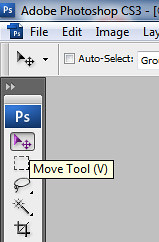
(d) Now use the Move Tool to align the two images, particularly the eyes area. You might want to zoom into 100 or 200% for the best possible alignment. You might want to check the alignment by Hiding/Showing Layer 1 (the eye to the right of Layer 1).
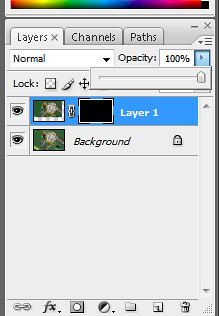
(e) once you have aligned the images, click Add Layer Mask (left image) and a white box will appear to the right of Layer 1 (right image).

(f) change the Opacity back to 100% and Invert the Mask by pressing Ctrl+I. Notice the white box is now black i.e inverted.
(g) Now we'll use the Brush Tool to unmask Donor's eye.
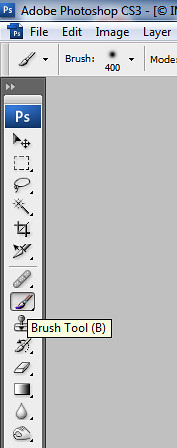
(h) Use [ and ] to control the brush size while working on the Unmasking to reveal the Donor's eye that we have inverted (behind Recipient's eye). Be really careful when working around the edges. You can use Ctrl+Z to undo at any time. Now our Recipient has received its new, in focus eye from Donor :)
I am sure there are many other ways to do manual focus stacking in Adobe Photoshop, but this is how I normally do it. This Adobe Photoshop Tutorial may seem very complicated and very daunting to you at first but all you need to do is follow the steps and practice it a few times. You'll get the hang of it in no time.
In CS3 there's also an option to auto align images. It's called 'Auto Align Layers' and it's under the Edit menu.
ReplyDeleteThanks, ya i know that.
ReplyDeleteIt won't work in this case because the perspective was slightly different.
Hi Kurt,
ReplyDeleteWhen taking the multiple shot to do the stacking, which is the best choice? Adjust the focus ring(assuming I'm using a tripod) or move the camera further/closer to the subject.
Thanks...
ILI
Not easy to move the camera if it's on a tripod, unless you have a macro focusing rail. In that case, adjust the focus ring.
ReplyDelete